People often think macrame is complicated because a finished wall hanging looks like it holds hundreds of different techniques. It does not. As cord makers, we watch this every day: nearly every pattern that comes across our benches is built from the same short list of knots, repeated and combined. Learn four of them properly and you can read most beginner projects, from plant hangers to keychains to table runners.
This guide walks through the essential macrame knots for beginners, in the order that actually makes sense when you sit down to work. No jargon you do not need yet.
What you need before you tie anything
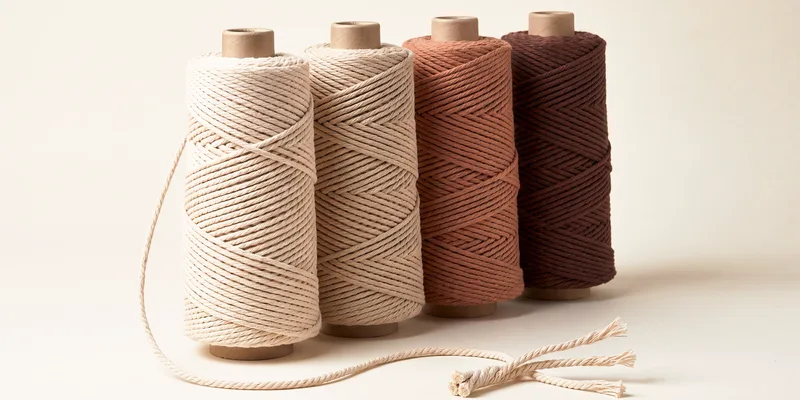
How to macrame starts with two things: a mounting point and cord that behaves. For the mounting point, a wooden dowel, a metal ring, or even a horizontal length of cord clamped to a table will do. For the cord itself, a soft 3–5 mm twisted or braided cotton is the friendliest place to begin, because it holds a knot without slipping and combs out into a clean fringe. If you are choosing a working cord, our macrame cord is made for exactly this kind of repeated knotting.
Cut your cords far longer than the finished piece — a common rule of thumb is roughly four times the target length, doubled when the cord folds over the mount. Beginners almost always cut too short. Extra cord is cheap; a half-finished panel is not.
The lark's head knot: how everything gets started
The lark's head (also called a cow hitch) is the knot that attaches your working cords to the dowel or ring. Fold a cord in half to make a loop. Lay the loop over and behind the dowel, then pull the two loose ends down through the loop and snug them tight. That is one lark's head, and it gives you two working strands to knot with.
There is a reversed version where the ridge sits on the back instead of the front. Both are correct; patterns will tell you which face they want. Master this first, because you cannot begin a project without it.
The square knot: the workhorse
If you learn only one decorative macrame knot, make it the square knot. It is the backbone of plant hangers, bracelets, and most flat panels. It uses four cords: the two outer cords do the tying, and the two inner cords stay still as a core.
A square knot is two halves:
- Left half: take the left cord over the two core cords and under the right cord. Then take the right cord under the core and up through the loop on the left. Pull gently.
- Right half: mirror it. Right cord over the core and under the left; left cord under the core and up through the right loop. Pull.
Do both halves and you have one complete square knot. If you tie only the same half over and over, you will not get a square knot — you will get the spiral, which we cover below. That surprise is one of the most useful lessons a beginner can have.
The half hitch and double half hitch: lines and shapes
Where the square knot fills space, the half hitch draws lines. A single half hitch is one cord wrapped once around a second cord. On its own it is loose, so in practice you almost always tie a double half hitch — two wraps — which locks in place.
Row these double half hitches along a leading cord and you can create diagonal lines, chevrons, and diamonds. This is the knot that lets patterns move from plain rectangles into shapes. It feels fiddly for the first row and obvious by the third.
The spiral knot: the easy twist
The spiral (or half-square-knot spiral) is the beginner favourite because it looks impressive and is nearly foolproof. As mentioned, you make it by tying the same half of the square knot repeatedly. After four or five repeats the work naturally twists on its own. Let it turn; do not fight it. It is the standard column for simple plant hangers and quick keychains.
How the essential knots compare
| Knot | Cords used | What it does | First project |
|---|---|---|---|
| Lark's head | 1 (folded) | Mounts cord to dowel or ring | Any |
| Square knot | 4 | Flat filling, panels, bracelets | Bracelet |
| Double half hitch | 2+ | Diagonal lines and shapes | Diamond panel |
| Spiral | 4 | Twisting column | Plant hanger |
A practice order that works
Do not try to learn all of these in one sitting on a real project. Cut six practice cords, mount them with lark's heads, and drill each knot until your hands stop thinking about it. A sensible sequence: lark's head, then a column of square knots, then a spiral, then a single row of diagonal double half hitches. Once those feel automatic, a plant hanger is genuinely within reach.
Consistent tension matters more than speed. The most common beginner tell is uneven knots, and that almost always traces back to cord that stretches or frays mid-row rather than to technique. Starting on a stable, well-made cotton removes that variable so you can judge your own hands fairly.
We supply cord to makers and studios in a range of thicknesses and colours, and we are happy to advise on the right diameter for a given project or to set up a bulk order — you can request a quote for larger quantities. But whatever cord you use, these four knots are the foundation. Learn them well and the rest of macrame is mostly recombination.
Frequently asked questions
What are the most important macrame knots for beginners?
The four essentials are the lark's head (to mount cord), the square knot (flat filling), the double half hitch (lines and shapes), and the spiral (a twisting column). The lark's head starts nearly every project, and the square knot is the single most-used decorative knot. Learn these and you can follow most beginner patterns.
What is the difference between a square knot and a spiral knot?
They start the same way, but a square knot alternates a left half and a right half so the work stays flat. A spiral is made by repeating only one half of the knot, which causes the column to twist naturally. Many beginners discover the spiral by accident when they forget to alternate.
What kind of cord should a beginner use for macrame?
A soft cotton cord around 3 to 5 mm, either twisted or braided, is the easiest to learn on because it holds knots without slipping and combs into a clean fringe. Cord that stretches or frays makes your tension look uneven and is hard to judge as a beginner. Starting on stable, well-made cotton removes that problem.
How much cord do I need for a beginner project?
A common rule of thumb is to cut each cord about four times the finished length of the piece, and roughly double that when the cord folds over a dowel with a lark's head. Beginners almost always cut too short. Err on the generous side, since running out mid-panel is far more costly than a little leftover cord.